Jobsscholar - Jobs, Jobs Hiring, Job Search Jobsscholar - Part Time Jobs, Jobs, Employment Agency Jobsscholar - Highest Paying Jobs, Job Application, Airport Jobs Jobsscholar - Government Jobs, Jobs Hiring, Find a Job Jobsscholar - Oil & Gas Jobs in Canada, Jobs, Internship

Tag Archives: What is Form I-797?

What to do After Applying for OPT EAD with USCIS (F1 Visa Employment Guide)

Are you an F1 visa student who has applied for the OPT EAD? In this guide, you will learn what to expect after mailing your OPT EAD application to USCIS, what to do after applying for your OPT EAD and how long to get USCIS receipt notice.

If you have successfully submitted your OPT application to USCIS, as discussed in this guide (How To Apply For OPT EAD), you might be wondering what are the next steps to follow after submitting your OPT. In this guide, you will learn what you can do and what to expect after you’ve applied for your OPT.

Note: After applying for OPT, you are not allowed to start working until you have received our EAD card and the “valid from” date on your EAD card has been reached.

What to do After Applying for OPT EAD with USCIS

  1. Tracking Delivery of OPT EAD Application

The very first thing to do is to track the delivery status of your OPT application. If you’ve mailed your OPT application, you should have requested the tracking number from your career service provider.

With this tracking number, you should be able to track the confirmation of delivery of your OPT application to USCIS.

If you experience any delays with the delivery of your OPT application, you should quickly contact the customer service rep of your career service provider or USPS.

Once you’ve confirmed the delivery of your OPT application on your current service provider’s website, keep a copy of this delivery confirmation for your records.

If you’ve paid for the OPT application fee using your personal check, keep an eye out on your bank account records just to see if USCIS has processed your OPT application fee.

  1. Await Receipt of Form I-797C

Once you’ve confirmed the delivery of your OPT application, the next step is to await the receipt of a form called the Form I-797C Notice of Action. This form will be sent by USCIS.

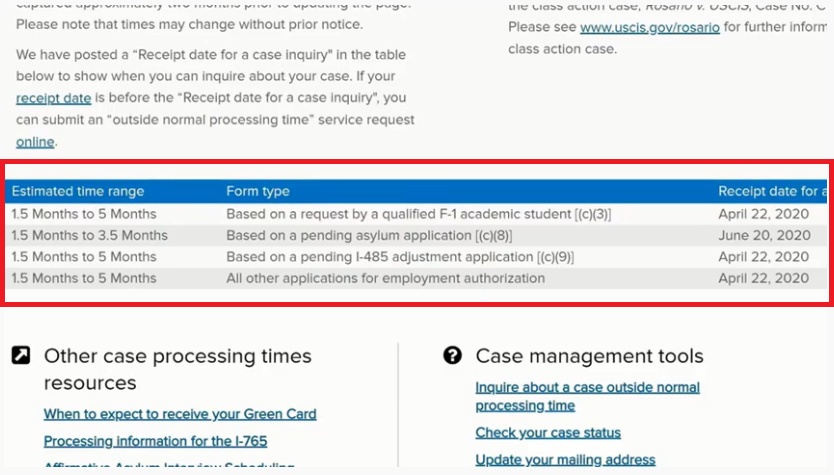
Typically, you can expect to receive this Form I 797 C in about four weeks, and in some cases it might take slightly longer than four weeks.

But nevertheless, you should not panic if you have not received your Form I-797C after four weeks of the confirmation of delivery of your OPT application.

Usually, if you’ve paid for your opt application fee using a personal check, you can tell that USCIS has pre-processed your OPT application. If your bank account records can show that your OPT application fee has been cashed by USCIS.

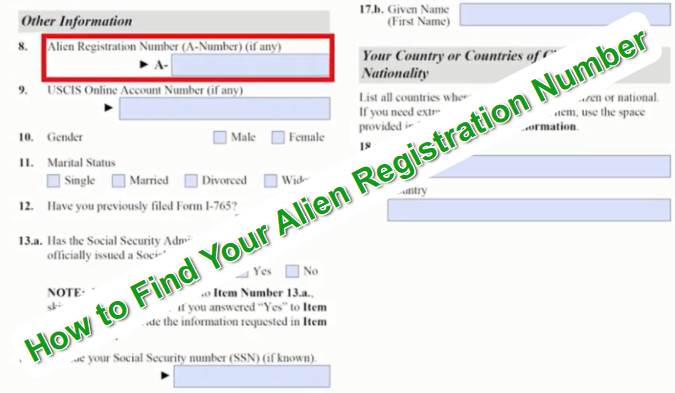
On the top left corner of Form I-797-C, you would find your receipt number and with this receipt number, you can track the status of your case on the USCIS case tracking website. Read this guide (4 BEST Ways to Track/Check Your USCIS Case Status Online) to know the full detail about the four best ways of tracking your case status with USCIS.

  1. Await Notice of Approval and EAD Card

If you’re successful with your opt application on the Case Status tracking website, your case status will indicate that your OPT has been approved.

Next, USCIS will mail you a Form I 797 Notice of Approval, followed by your Employment Authorization Document card. This Form I 797 Notice of Approval, will arrive in the mail before you receive your EAD card.

Responding to a USCIS RFE

In the unfortunate circumstance that your OPT application requires more investigation by USCIS, USCIS will send you a letter called a Request for Evidence (RFE). On this Request for Evidence, USCIS will explicitly define what documents you need to provide in order for your case to be adjudicated.

If you received a request for evidence from USCIS, make sure to contact your school’s international office as soon as possible, to proceed with next steps.

It is very important that when you respond to an RFE, make sure to submit all the requested documents by USCIS in a single mail.

  1. Submitting Copies of EAD Card to your DSO

Finally, once you’ve received your ID card in the mail, make sure that information listed on the EAD Card is correct. And once that’s correct, make a copy of the front and back of the ID card and send that to your school’s international office.

You should also note that you’re not allowed to start working on OPT until the start date listed on your ID card is “Current”. Failing to do so will result in you violating your OPT status and your OPT could be terminated.

Those are what to do After Applying for OPT EAD with USCIS.

Frequent Questions About OPT EAD and Answers

Question: After getting your EAD and signing a job contract, who do you send your offer letter to?

Answer: For the OPT, you are only required to report your employment to the Student and Exchange Visitor Program (SEVP). Usually, there is no obligation here to show your offer letter for confirmation. You simply state the employer name, address, job role, and pay for your employment.

DISCLAIMER: This guide and content is designed for general information only and is NOT legal advice. The information in this guide should not be construed to be formal legal advice. For legal advice, you should consult an attorney.

USCIS Biometrics Appointment Tips | What happens after Biometrics Appointment

In this informative guide, you’re going to learn step by step everything you need to know to have a successful USCIS biometrics appointment in 2022. You will also get some really helpful tips for your biometrics appointment that no one talks about. Getting to the USCIS biometrics appointment is an important stage in your immigration journey.

If you’ve applied for an immigration benefit to USCIS, such as an application for a green card or an application for a change of status, you might be required to provide your biometric information as part of your application process.

This educative guide will teach you everything that you can expect at your USCS biometrics appointment, and also some tips that can help you have a good experience at the USCIS Application Support Center, where your biometrics are going to be collected.

What is USCIS biometrics appointment?

Some people worry about what is involved, especially when they hear the word “Biometrics”. You should not scared about the word “Biometrics”.

All this means is that during your appointment, you will be asked to provide information that would be used to verify your identity. This identifiable information to be collected during your appointment will be your fingerprints and your photograph.

By submitting your biometric information, you will be giving USCIS permission to perform a criminal background search on you. And the outcome of this background search will be used to either approve or deny your application.

What you should know about this appointment is that it’s not going to be an interview experience, not even close to that.

All the USCIS biometrics appointment is an opportunity for USCIS to see you in person and to collect some identifiable metrics, such as your fingerprints and a photograph of yourself.

How long does it take for USCIS to send biometrics appointment?

If your USCIS application requires your biometrics information, USCIS will send you a biometrics appointment notice. Usually, you can expect to receive this biometrics notice from USCIS within 12 weeks after you file your immigration application. Although, your wait time will depend on the USCIS service center processing your case.

During this appointment, you don’t have to pay a fee for the collection of your biometrics as you would have already paid this fee at the time you filed your application to USCIS.

Your appointments notice will also come with a worksheet that has to be completed before you attend your biometrics appointment. When you receive the biometrics notice, it’s going to have the location of the USCIS Application Support Center where your biometrics information is going to be collected. It’s also going to have the scheduled date and time of your appointment.

USCIS Biometrics Appointment Notice (Form I-797C)

Something else to pay attention to on this form is a code number that appears on the top right corner. This code number could take the number 1, number 2, or number 3. And these numbers will decide what type of biometric information that you’re going to be required to provide on the day of your appointment.

USCIS Biometrics Appointment code number

You will learn more about the differences between these code numbers, 1, 2, 3, as you read on, but for now, let’s talk about what you should bring during your appointment.

Document Required for the USCIS Biometric Appointment

On the day of your appointment, you’re going to need to have a valid photo identification. This could be a valid driver’s license, it could be your passport, and for certain applicants, a green card could be a required form of identification during your appointment.

You’re also going to need the original copy of your Biometrics Appointment Notice that USCIS sent to you

Due to health and safety precaution, the application support center may not accept walk in appointments. As they need to limit the capacity of visitors within the building at all times.

This was compiled while the Covid-19 Pandemic is still ongoing. So in certain locations, you might be required to bring with you a face covering. Otherwise, you may not be granted access into the building.

So make sure go there with your face mask for your appointment and be prepared to keep this on at all times.

On the day of your appointment, you should plan to get there on time and preferably you should get there about 15 minutes before your scheduled appointment time shown on your appointment notice (or Form I-797C).

WHAT HAPPENS WHEN YOU GET TO THE APPLICATION SUPPORT CENTER (ASC)?

When you show up at the Application Support Center, you’re going to notice signs on the door that tell you that the use of electronic devices are prohibited. So the first thing you should do is to turn off your phone, if you’re going to be taking that into the building.

Once you walk into the building, you’re going to meet a receptionist who’s going to review your photo identification and will also review your biometrics appointments notice.

Once this receptionist confirms your identity and reviews your biometrics appointments notice, you are going to be handed a processing form and the ticket number.

This processing form that will be handed to you is just for the use of the Biometrics Officers and after that you will be asked to take a seat and wait for a Biometrics Officer to call your ticket number.

Once a Biometrics Officer calls you by your ticket number, you will walk up to the Biometrics Officer and hand in all your documents, including the processing form.

The Biometrics Officer will review all your documents and will then enter your information into a computer.

Codes 2 and 3

Depending on the code number that appears on your biometrics appointment notice (Form I-797C), what you’re going to be asked to do at this point is going to vary. You will be asked to scan some or all of your fingers, provide an electronic signature, or have your photo taken.

If your code number states code 2 or 3, a Biometrics Officer will ask you to take a seat where your digital photograph will be taken. And on the other hand, if your code number States code 1, your digital photograph will not be taken.

Scanning of Fingerprints

When it comes to the scanning of your fingerprints, if you have code 1, then you can expect to get all your fingerprints scanned. If you have code 2, you’re only going to have your left and right index fingers scanned. And if you have code number 3, again, just like code 1, you can expect to have all your fingerprints captured.

Don’t worry about making any mistakes with the scanning of your fingerprints as the Biometrics Officer is going to be there to make sure that your fingerprints are properly scanned into the system.

What happens after Biometrics Appointment

After your fingerprints have been scanned, you will be asked to provide your electronic signature. Once this process has been completed, the Biometrics Officer will stamp your form I-797C, marking that your biometrics information has been collected.

USCIS Biometrics Appointment Notice

After that, your job is done and you may leave the Application Support Center. The total time spent during your appointment shouldn’t exceed 20 minutes. But in some cases where you have a lot of people waiting before you, or if you have few Biometrics officers, your appointment time could exceed 20 minutes.

Depending on what your USCIS application, for example, if it’s an adjustment of status application, after the uscis biometrics appointment, you’ll have the green card interview next.

Most of these biometrics offices are very professional and very polite. So you should expect your experience to be quite pleasant. You should understand that by providing your biometrics information to USCIS, you are granting USCIS permission to conduct a criminal background search on you.

If you have a criminal history and you’re worried about the outcome of this background search and how that could affect your immigration application, then it is highly recommend you seek the counseling of an experienced immigration attorney.

Thanks for reading this guide and I hope you found it helpful.

DISCLAIMER: This guide and content is designed for general information only and is NOT legal advice. The information presented in this guide should not be construed to be formal legal advice. If you need legal advice, you may contact a licensed attorney.

Alien Registration Number USCIS#: Who gets the A-Number, where to find it, and how to use the number

If you’ve ever completed a USCIS immigration form, you might have come across an entry asking you for your Alien Registration Number. So this might trigger you to ask the question, what exactly is this Alien Registration Number? Do I even have this Alien Registration Number? And if do, where can I locate or find this Alien Registration Number?

In this post, you will learn in detail, what the Alien Registration Number is, as well as the answers to some frequently asked questions that applicants completing USCIS immigration forms might have about the Alien Registration Number, such as who gets the A-Number, where to find it, and how to use the number.

What is Alien Registration Number or USCIS# or A-Number?

The Alien Registration Number is a unique 7 to 9 digit number beginning with the letter A. This number is also called the Alien Number (A-number) or the USCIS number (USCIS#).

This number is assigned by USCIS to track the immigration records of some non-U.S citizens. As a non U.S citizen leaving in the U.S, a very good comparison to your Alien Registration Number is your Social Security Number (SSN).

The exact same way your Social Security Number is used to track your tax records, your Alien Registration Number is used to track your immigration records. This Alien Registration Number or USCIS# is to your U.S. immigration record what a Social Security Number (SSN) or Individual Tax Identification Number (ITIN) is to your U.S. tax records.

Just like the Social Security Number, the Alien Registration Number never expires. USCIS only issues A-Numbers to non-U.S citizens who have applied for permanent residency in the U.S.

The only other class of people who get Alien Registration Numbers are nonimmigrants on an F1 status who have applied and been approved for Optional Practical Training (OPT). With the exception of F1 students who have applied and been approved for Optional Practical Training, no other nonimmigrant class in the U.S is assigned an A-Number by USCIS.

So now you know exactly what the Alien Registration Number is, the next question you might have then is, where can I locate my A-Number if I happen to be someone who has been approved for the OPT, or if I happen to be someone who has applied for permanent residence?

There are several documents issued by USCIS and the U.S Department of State that carry the A-Number. Some of these documents include;

  • the Employment Authorization Document Card,
  • the Permanent Residency or Green Card,
  • the US immigrant Visa, and
  • some approval notices issued by USCIS.

How to Find/Locate Your Alien Registration Number

If you have been assigned an Alien Registration Number, you can locate this number on the following types of government issued documents:

  • It is the USCIS# on the front side of the Employment Authorization Document (EAD Card)
  • It is the USCIS# on the front side of the Permanent Resident Card (Green Card)
  • It is the same as the Registration Number on an Immigrant Visa
  • It is written on the applicant section located at the top of Form I-797 Approval Notice for an F-1 student approved for OPT or STEM-OPT
  • It will be in the USCIS Alien Number field located at the top of the Form I-797 Receipt Notice for someone who has applied for permanent residency

Alien Registration Number USCIS#

So once you’ve been assigned an Alien Registration Number every other time in the future when you complete the USCIS Immigration Form, you would have to enter this number.

As an example an F1 student who has been approved for OPT and has been assigned an A-Number, should make use of this A-Number when completing a subsequent immigration form such as the form I-765 for the STEM-OPT extension or when applying for a change of status from the F1 status to the H1B status.

Some people are assigned alien registration numbers that are seven or eight digits long. When completing the USCIS immigration form, you will find that you are required to enter a nine digit number. So if you happen to have a seven or an eight digit alien registration number you should add zeros before the digits to complete the nine digit requirements on the USCIS immigration form.

For example, let’s say you have an A-Number that’s given as A-1234567, this will be entered as A-001234567 on the USCIS immigration form. On the other hand, if you’ve never been assigned an A-Number by USCIS, then when completing the USCIS immigration form you can leave the entry for the A-Number blank.

In Summary

The Alien Registration Number or USCIS# or A-Number is a unique 7 or 9-digit number assigned by the United States Citizenship and Immigration Service (USCIS) to keep track of the immigration records of certain non-citizens in the United States.

Where can I find or locate my Alien Registration Number?

For example, the Alien Registration Number will be the USCIS number located on the front side of the Employment Authorization Document Card.

It will also be the USCIS number located on the front side of the Permanent Residency Card. You can also find the A-Number listed as the Registration Number on your immigrant visa to the U.S. And if you happen to be someone who has applied for an adjustment of status in the U.S, your Alien Registration Number will be shown on the top corner of the Form I-797 Receipt notice.

DISCLAIMER: This post and content is designed for general information only and is NOT legal advice. The information presented in this post should not be construed to be formal legal advice. If you need legal advice, you may contact a licensed attorney.

4 BEST Ways to Track/Check Your USCIS Case Status Online

How to Track/Check Your USCIS Case Status Online: The process of obtaining your immigration document from USCIS is often complex, with several challenges. In order to ensure your pending case moves as quickly as possible, you need to stay up to date on your case status. If you’d like to track/check your USCIS case status online, there are several inquiry options available to you, including email, telephone, direct mail, apps, or in-person at your local processing center.

In this post, you will learn several options to effectively track your case with USCIS. You will also learn how to check the processing time for the USCIS Service Center where your case was filed.

4 BEST Ways of Tracking Your Case Status online with USCIS

Below are 4 BEST ways to Track Your Case Status online with USCIS.

  1. USCIS Online Case Tracking

The first and simplest way you can track the status of your case is by going online to the USCIS Case Status web page. In order to track your case, you need to enter the receipt number found at the top of your form, I-797C.

What is the USCIS receipt number?

A Receipt Number is a 13-character code that is used to identify and track applications and petitions for immigration benefits. It can be found on the I-797, Notice of Action

  1. Calling USCIS Customer Service

The second way to track the status of your case is by contacting USCIS over the phone. You can do this by calling USCIS Customer Service. One of the benefits of this method is that you can find out the status of your case without having your receipt number.

However, to do this, you need to talk to a USCIS agent and sometimes getting a hold of these agents could take as long as 2 hours.

  1. Email USCIS Service Center

The third way you could track the status of your case is by sending an email inquiry to the USCIS Service Center where your application was filed with the following information:

  • full name
  • birth date
  • alien number (if applicable)
  • date your application/petition was filed
  • location your petition/application was filed
  • receipt number (if you’ve received one)

If possible, include a copy of your receipt with your inquiry letter to facilitate the case status update process.

  1. Use Free 3rd Party Apps

The fourth and final way you can track your key status is by downloading the free app from the Google Play Store or the App Store.

USCIS Case Status Tracking APP

One of the benefits of this method is that you get an immediate notification whenever there’s a change to your pending case.

How to Check Your USCIS Case Status by in Person

Lastly, you can inquire in-person about the status of your USCIS case. This will require you to make an appointment with your local processing center. Appointments can be made regardless of whether you are currently in the U.S. or not. To schedule an appointment, visit the USCIS appointment scheduling page.

Who Can Check Their USCIS Case Status

If you have submitted a visa application, extension, transfer or a green card application to USCIS, you will be able to check your USCIS case status online. USCIS also offers case status tracking for:

  • Form I-140
  • Form I-485
  • Form I-765
  • Adjustment of Status (AoS)
  • Advance Parole
  • Employment Authorization Documents (EAD)
  • Citizenship

The types of applications you can check in the USCIS website include:

  • H1-B Applications
  • Green Card Applications

How to Check the Current USCIS Processing Time

You might also want to determine the current processing time of the USCIS Service Center where you filed your application. To do this, you want to go to USCIS.gov and on the homepage you want to click on Tools and on the topics you want to select USCIS Tools and Resources, and on the self-service Tools, you want to select case processing times.

To check the processing time for a specific form, you need to know:

  • Petition/Form type
  • Processing center
  • Classification or basis of filing

For example, if we fought an I-765 application to the Texas Service Center.

On the forms, you select I-765 and on the field Office, you Select Texas Service Center and click on Get processing Time.

And now it’s going to display a table with an estimated time range and different form types received on different dates. See table below

USCIS Processing Times

Here’s how to interpret this table above.

The first number indicates how long it takes USCIS to process 50% of all the files received on April 22, 2020.

The second number indicates how long it takes USCIS to process 93% of all the files received on April 22, 2020.

For example if you take a look at the first row it shows that it takes 1.5 months for USCIS to process 50% of all the files petition for F1 students and five months to process 93% of all the petitions filed by F1 students on April 22 of 2020.

USCIS Case Status FAQ

Can I check my USCIS Case Status without a Receipt?

No, you cannot check your case status without a Receipt. If you do not have a Receipt, the status you are looking for will not be found online.

What is the USCIS receipt number?

A Receipt Number is a 13-character code that is used to identify and track applications and petitions for immigration benefits. It can be found on the I-797, Notice of Action

When will my USCIS case status be approved?

Different cases and forms take different amounts of time to process. A case can be processed in a few months or after more than a year, depending on the case. To look up the current processing time for a particular form, use the USCIS Check Case Processing Times page.

If you found this article very helpful make sure to like it and share it. Thank you for reading this post.

DISCLAIMER: This post and content is designed for general information only and is NOT legal advice. The information presented in this post should not be construed to be formal legal advice. If you need legal advice, you may contact a licensed attorney.

What is Form I-797 and What is next after receiving the immigration form?

This educative article will explain some important things we need to know about the Form I-797, Notice of Action and the next thing after receiving an I-797 immigration form.

What is Form I-797?

Form I-797 Notice of Action is a form sent to someone who has submitted an application or petition to the USCIS. Basically, this is sent to you once the people at USCIS have received your application, which usually happens after two to three weeks.

The most important thing to know about Form I-797 is that it serves multiple purposes. For examples, it may be sent to inform you about the approval of your application, or it may ask for extra evidence for your application to be approved. In some other cases, it can also tell you when your scheduled appointment should take place.

What is the next step after receiving I-797 immigration form?

If a person changes or extends his/her status while legally in the United States, a Form I-797, Approval Notice will have a new Form I-94 located at the bottom of the notice. The Form I-94 number should match the Form I-94 issued to the person upon his/her last entry into the United States.

It’s also important to know how Form I-797 looks.

Basically, this form has its top left-hand corner imprinted with a number that has three letters at the beginning. After the three numbers, there are ten digits on the lower end of the form. There is a replacement I-94 card on the form.

You will also find a

  • description of the action you requested,
  • as well as your name,
  • visa classification,
  • approved and validity dates.

Types of Form I-797

  • Form I-797 Standard Notice: Issued when an application or petition is approved.

In case you receive this particular Form I 797, then it means USCIS is notifying you about the approval of your application or petition.

This isn’t the actual document that you need, it is nothing but a receipt. It cannot be used for jobs, travel, or anything of the source. In addition, as USCIS specifies Form I-797 is not a form you can fill out despite not being able to be used for any of these purposes. You still need to keep a copy of this receipt. So you have evidence in case something happens.

This form gives you the information about your application and it also allows you to track your case on the official USCIS website.

  • Form I-797A, Notice of Action: Issued to an applicant as a replacement Form I-94

This form is not that different from the regular I-797 form. The difference is that this one is used as a replacement for an I-94 form with the bottom serving as the official document.

Basically, this form has meant for foreign people who want to come to the US and is also known as the Arrival departure record of the document. You will find the date to which you are allowed to stay, the admission class, and the date of the admission.

  • Form I-797 B, for I-140 B, Notice of Action: Issued for approval of an alien worker petition.

If you are an immigrant who wants to work in the US, the chances are that you submitted Form I-140. If that is the case, then you will receive form I-797 B. This will give you details about your application, like information for admission to the US and many other things.

  • Form I-797C, Notice of Action: Issued to communicate receipt of payments, rejection of applications, transfer of files, fingerprint biometric, interview and re-scheduled appointments, and re-open cases.

Form I-197C, is usually sent to give you some important information. To be more specific, it will inform you in case of a scheduled or rescheduled appointment transfer, reopening or rejection.

It is probably the most common type of Form I-797 sent to applicants. You should read this paper very carefully because it will tell you what you should do next with your application. Make sure you don’t end up ignoring or misunderstanding certain aspects of this form. This may lead to delays and you don’t want that.

  • Form I-797D: Accompanies benefit cards.

With Form I-797D, you will receive a benefit card in general. You don’t really need to do anything with this form, but you should still make sure to keep it for potential evidence. Keep in mind that this form includes a green card or another official document usually.

  • Form I-797E, Notice of Action: Issued to request evidence.

You may have applied to the USCIS, but even if you submitted some evidence, it may not be enough to give you approval. That being said, USCIS will ask you for additional information, which is usually asked for through Form I-797E, called the Request for Evidence.

If you read this form, you will notice that it says there may be a potential problem with the evidence you sent or that there wasn’t any evidence provided. Read it carefully and follow the instructions on it. You should meet the time limit too, or else your application may be rejected.

  • Form I-797F, Transportation Letter: Issued overseas to allow applicants to travel.

Form I 797 F is the most unique one of the bunch. Unlike the other forms, this one can be used for travel as it is a travel permit. Make sure to follow the instructions the document gives you, and you will be able to travel.

Hints:

Whenever a person files a petition or application with the U.S. Citizenship and Immigration Service (USCIS), a Form I-797, Receipt Notice is issued. The document serves as proof the USCIS has received a person’s petition or application.

Usually, this form is just a receipt that shows you’ve submitted an application for a particular benefit. Once USCIS establishes that you are eligible to receive the benefit for which you submitted the application, they will send you an I-797. This will tell you more about the immigration benefit. If any benefit has been given to you, then you need to carefully read the notice sent to you.

Question: Can I use Form I-797 in place of a visa?

Answer: No, Form I-797 is a totally different document and it cannot be used in place of a visa, even USCIS clearly specifies this. If you happen to leave the US and want to enter the country, you will need an actual visa.

However, if you are an immigrant and need an extension of status, you can apply for it to the USCIS. If the application is approved, you’ll receive Form I-797A, which is proof that USCIS has received your application and accepted it.

This means that you can remain in the US under the new status or the current one, depending on whether you’ve applied for a change or an extension of status. Your stay is determined by the date written in the form.

But if you leave the US and want to return, you cannot use Form I-797A for that, you need to apply for a visa. It’s important to understand what Form I-797 is. You want to know why you’ve received it, but no matter the reason, two things are clear. You need to read the document carefully and you need to keep a copy of it.

I hope this article has been helpful to you.

DISCLAIMER: I am not an immigration attorney, therefore I cannot consult you on your personal case and review your forms. My knowledge is based on the information publicly available on USCIS website and other resources (such as immigration channels on YouTube, articles online, Reddit, etc). YOU MAY NOT cite these article in the “Preparer” section on your immigration applications.

error: Content is protected !!